Monday, June 28, 2010

Chocolate and Pistachio Cream Pie


I am one day behind on my beloved routine. Grand Mama has arrived to stay for the rest of the week, so in honour of her stay I decided to postpone the recipe Mr Hooper selected at random. The cookbook this week is 'pie' by Angela Boggiano. When I worked as a nanny in London a few years ago, I ran a bit of a side project making pies to sell at the fancy pants school my kids went to. I made chicken, fish and cottage pies all organic and low in salt and fat, I managed to sell a few and even got some repeat business, which was a great boost to my ego. Although short lived, I did enjoy the thrill of manufacturing, all be it on a small scale. I will delve further into pies one day soon, and share my recipes that were great for kids.


Anyway, back to the recipe, another dessert, which is getting awfully suspicious, I suspect there is some skulduggery with the 'random' selection process. Chocolate and Pistachio Cream Pie, doesn't it just scream...'I WILL MAKE YOU FAT!' Another pastry adventure, oh dear.


I didn't end up using the pastry recipe in the book, this was because the recipe called for lard, of which I had none (well in the culinary sense). So I turned to my ever trusted Stephanie Alexander 'the cook's companion'.


THE PASTRY (shortcrust)
180g cold unsalted BUTTER(I only had salted)
240g plain FLOUR
zest of one ORANGE
pinch of SALT (I left this out)
1/4 cup WATER
MILK, to glaze


Mix the zest through the flour. I decided to grate the butter, so measured it out and wrapped it in tin foil. To avoid the butter softening the tin foil gives you something to hang onto while you grate. So I grated the butter on top of the flour and using a knife mixed thoroughly until I had very rough bread crumbs. Still using the knife I very slowly mixed in the water, until I had a damp crumbly mixture. I brought it all together briefly with my hands, made into a ball and wrapped with glad wrap. It sat in the fridge for about a day/night until I used it.


THE CREAM FILLING
2 EGGS
150g CASTER SUGAR (plus a little extra for sprinkling)
150ml thick CREAM
150g dark CHOCOLATE, finely chopped
25g PISTACHIO nuts, toasted and roughly chopped

This recipe required a rectangular fluted tart tin (36 x 11cm), but I didn't have one, so I instead used a 24cm diameter circular tart tin. Divide the pastry into about one bigger lump, leaving a smaller lump for the lid. Roll out the big lump and line the tart tin, cover with glad wrap and put in the fridge. Roll out the small lump making sure there is enough to make a lid and wrap in glad wrap and into the fridge.


Heat oven to 180C.


Place the eggs and sugar in a bowl and beat together. At this point things went a bit down hill. I just gave it a whisk, but the Grand Mama informed me afterwards I should have beaten, until thick, something the book could have mentioned. So to the eggs/sugar add the chocolate and pistachio's, pour into the case.


Brush the rim with some milk and position the lid over the top. Press the edges to seal, I rolled the rolling pin over the rim, which worked really well, and is handy for trimming the edges. Make a steam hole in the centre (one swift stab with a knife), glaze with milk and sprinkle with sugar. In the oven for 30-35 minutes.


I had over flow which I suspect was a result of the filling being too runny. But other then the pastry being a bit gooey around the edges, this pie came out pretty good. The pistachio's weren't too much of a feature and it was very rich, a slither was about all you needed, with a dollop of vanilla ice cream or cream fraiche. I think it could also be nice served cold with a strong cup of delicious coffee.


The Grand Mama is busy tidying up my water logged vegetable garden so I had better get out there and lend a hand.

Friday, June 25, 2010

Best of the week....Seared Spring Onion Sauce

Today I tried to put one of my weetbix into the coffee plunger. I am all for experimenting in the kitchen, but I suspect a plunged weetbix would not be very good, and certainly not a suitable replacement for my beloved morning coffee. So it would appear I am tired. Tired I may be, but I did wake up in a celebratory mood, The Boss has stopped waking three times in the night, he is now waking at 4am, which in my new found world, is something to rejoice. I hate to think what I was eating for breakfast when he was waking at 10, 1 and 4!

This week I found a fabulous recipe in my beloved Stephanie Alexander 'the cook's companion'. What a wonderful book, it is literally the A-Z for cooking. This recipe is incredibly simple, and used a method I had never thought of employing.

SEARED SPRING ONION SAUCE
4 SPRING ONIONS, finely chopped (I creep into the green bits, as I like the colour, but its up to you if you prefer using only the white section)
1 tspn FRESH GINGER, finely chopped
1 tspn GARLIC, finely chopped (that's about 2 cloves)
1/4 cup light vegetable OIL (I use rice bran oil and it works just fine)
1/4 cup SOY SAUCE
1 tbspn rice wine of dry sherry (I have neither, but threw in some rice wine vinegar)
1 tspn SESAME OIL

Mix the spring onion, ginger, and garlic in a heat proof bowl.

Heat oil until just smoking hot and pour it over the contents of your bowl. There will be a brilliant sizzle as the oil hits the bowl.

Stir, and add the remaining ingredients. The oil does separate, so have a whisk handy to give it a good mix before drizzling.

We had this sauce drizzled over some poached chicken and steamed asian greens with a bit of rice and it was delicious. Mr Hooper commented that it tasted very 'authentic', which translated, means it tasted like a stir fry from the local Chinese take away. I think that it is a huge compliment to the recipe, as we both love a good stir fry from the local Chinese take away! This could be our takeaway replacement, as its cheaper and MSG free, something I am happy to give up (even if it makes food taste awesome!).

I think this sauce is going to be super versatile, next time I am going to toss it through some egg noodles and serve with grilled prawns...YUM! Let me know how you served the sauce so I can add other combos to my repertoire.

Have a fab Friday!

Wednesday, June 23, 2010

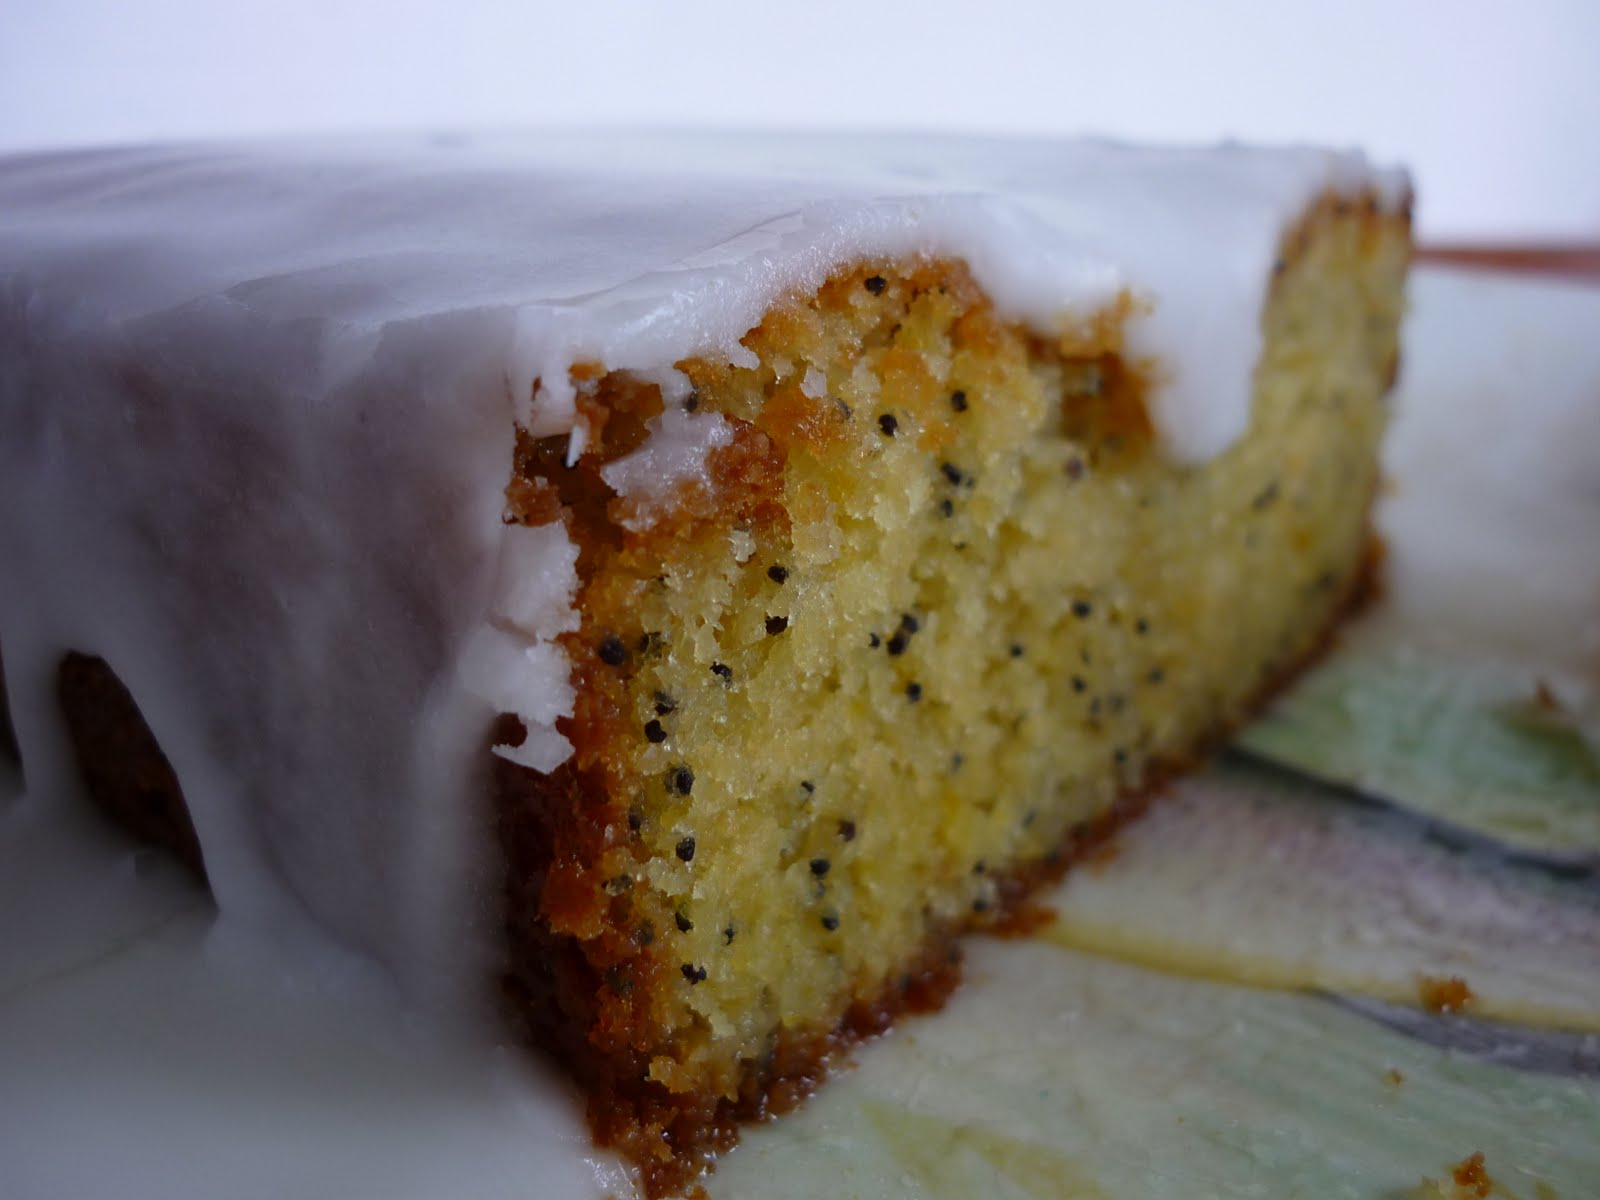
Lemon and Poppy Seed Drizzle Cake


This week has been moving pretty slow, The Boss is growing teeth, and we all know about it! He has got two jagged beasts creeping through his bottom gum, and at times I think he might be growing two shards of glass...ooww! Apparently if he does any biting I tell him a stern no, but I find this a very curious theory....does a 5 month old really understand, I suspect not.

Gone are the days of my body being a temple (well perhaps a slightly run down temple), instead I have accepted the harsh reality of being a vessel. So to nurse my wounded soul, I have had to bake something deliciously sweet and a little bit sour....

This cake would make for a perfect Friday shout, if your work mates have been behaving themselves, or perhaps invite some friends over to enjoy with a cup of tea, or better yet deliver it to an elderly relative, I think all old people love a good drizzle cake. It is so moist and sticky and delightfully peppered with poppy seeds. Sadly for my waistline I like drizzle cake that is both drizzled and iced. Originally this recipe was an orange and poppy seed cake with glazed slices of orange on it, care of Donna Hay I think. With a few tweaks here and there the cake goes a little bit like this...


CAKE
125g BUTTER, softened
1/2 cup CASTER SUGAR
2 EGGS, room temp
1 tbspn finely grated lemon rind
1 cup SELF-RAISING FLOUR, sifted (or 1 cup plain flour with 1 tspn of baking powder)
2 tsp POPPY SEEDS
1/4 cup MILK

DRIZZLE
100g CASTER SUGAR
100ml LEMON JUICE

ICING
about 2 cups ICING SUGAR
zest and juice of 1 LEMON
a little warm WATER if you need it

You will also need a 5 cup capacity loaf tin.

Preheat oven 160C. Cream butter and sugar with a beater, until pale and fluffy. Add the eggs, one at a time, beating well in between. Add the poppy seeds, lemon rind, milk and flour and beat until just combined. Spoon into a lightly greased loaf tin, lined with baking paper, and into the oven for 50 minutes, it should be golden and a skewer should come out clean. This actually took 50 minutes in my oven, which is very rare. How easy is that, it literally took about 10 minutes, most of which was getting things out of the pantry!

While the cake is cooking, throw the drizzle ingredients into a pot and heat at a medium heat until the sugar is dissolved, set aside and allow to cool a little.

When ready, take the loaf out of the oven, allow to cool for about 5 minutes take out of the tin and put on a serving plate or board. Stab the loaf a few times with a skewer and drizzle over the drizzle. Don't be alarmed if you end up with a pool of drizzle at the bottom of the cake, this is to be expected.

Mix together the icing ingredients, and once the cake is cold, ice.

To make it pretty you could sprinkle over a few ribbons of lemon zest.
Why not spread a little love in the office this week, you may start a trend, everyone benefits from a trend that involves baking for morning tea once a week. Let me know if it works!


Monday, June 21, 2010

Random #3 - Apple and Almond pudding and it's Gluten Free!


This weekend it was one of Delia Smith's books that was to be cracked, she is such an old school English chef, I was delighted at the prospect of something warm and hearty to make as we plunge towards the shortest day. I have a copy of The Delia Collection: Puddings. Its a book that I very rarely refer to, and I'm not sure why, its strange how some cook books you buy, because you HAVE to have them, and yet they end up being sent to the back of the cupboard along with the random collection of cook books produced by your local primary school! I have started using the public library for cook books, I figure the books you are happy to pay on-going late fines for are the books you should probably invest in. When Mr Hooper announced the recipe on Friday night I felt waves of relief, it was a simple recipe that I actually had all the ingredients for. My under arm dangle, was safe to dangle with gay abandon this weekend, and the rolling pin remained safely tucked away.


The recipe is Baked Apple and Almond Pudding. It contains very few ingredients and was really yummy served warm with a drizzle of cream. An added bonus is that the pudding is gluten free. I am a big fan of gluten, in general most meals I cook are laden with gluten based ingredients. Lately lots of my friends have been trying life without gluten to see if it will improve certain ailments, mostly of the aggravated tummy kind. I have been reviewing the gluten free options, and have discovered that it is quite tricky cooking for a completely gluten free diet, so I have something to work on for the next time I have my GF friends over for dinner. If you have any suggestions on good gluten free dinner party meals, please let me know.


My BF is going gluten free, and as she is one of the few readers of this wee blog, I am going to dedicate this recipe to her (sorry Mum I will dedicate one to you soon). The recipe calls for cooking apples, but I used what we had, which I think were Pacific Rose.


450g APPLES, peeled, cored and sliced, make sure you get all the rough bits from the core, as these will never soften no matter how long you cook them.
50g soft BROWN SUGAR
110g ground ALMONDS
110g BUTTER, at room temp
110g golden CASTER SUGAR (I only had the regular kind, and it worked just fine)
2 large EGGS, beaten

You will also need a 20cm oven proof baking dish. Pre heat the oven to 180C.

Place the apples in a saucepan with the brown sugar and about 2tbsn of water. Simmer gently until soft, but not falling apart. This took about 30-40 minutes on a very low heat. Layer them on the bottom of the baking dish.
In a mixing bowl cream the butter and sugar with a beater, until pale and fluffy. Beat in the egg a little at a time, you want to avoid curdling the mixture. When all the egg is in, carefully fold in the ground almonds, the mixture should still be light and airy. Spoon the mixture over the apples and smooth out with the back of a spoon.

The recipe suggested baking for 1 hour. But in my oven at 180C it was ready after about 45 minutes, and probably could have come out a little earlier.

The pudding was very delicious, but if I were to go back and do it again I would double the amount of apples used, I felt it was a little lacking in the fruit department, and I would have also sprinkled in some cinnamon with the apples, or perhaps simmered them with a cinnamon stick for flavour. It was quite sweet so I think it would benefit from being served with some creme fraiche or natural yoghurt.


This would make a great mid week pudding if you are craving something sweet and delicious but not so naughty that you can't go back for seconds.....there is fruit in it after all.

Friday, June 18, 2010

Best of the week, for all you stew lovers...Moroccan Beef Stew with Apricots

This weeks best is a Moroccan beef stew, I am going to say it is the best stew I have ever made, a big call I know, but I was literally licking my plate, which is not something I would usually stoop to for stew, that kind of breakdown is manners is usually reserved for my pudding bowl. I never went to Morocco while I lived in London, but it was on my list of to do's, which sadly never got done. So I shall take my stew and perhaps the latest Sex in the City film, and try not to feel too hard done by. However, I can tell from what I have already seen that I might be over the Sex in the City thing. I spent years clinging to the fabulousness of the show, I loved the promiscuous attitudes of the characters and the amazing clothes. But sometimes great things must come to an end. I thought the first movie was OK, but in my new found limited free time, I don't think I can bring myself to spend it watching over 2 hours of a sequel......perhaps after wine number 2 I might think differently. Not that I am currently allowed wine number 2, even wine number 1 fills me with guilt. The Boss hasn't complained yet, but if he grows up to be raging booze hound I will be prepared to take a small amount of responsibility!


So to the stew (for 2 plus one school lunch), I found and modified a recipe on ifood.tv, I made this the conventional way in the oven, but a slow cooker would do the job as wel. You are going to need...


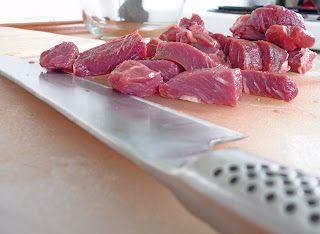
about 500g diced BEEF, cuts such as chuck, gravy or shin are great, and very economical
1/4 cup FLOUR
3tbs vegetable OIL
1 large ONION, chopped
3-4 cloves GARLIC, chopped
2 large CARROTS, diced
1 can whole or diced TOMATOES
1tsp ground CORIANDER and CUMIN
3/4tsp ground GINGER
1/2tsp TURMERIC
1/2tsp SALT and BLACK PEPPER
1/4tsp CINNAMON
1 1/2 cups of beef or chicken STOCK
2tbs HONEY
2 CINNAMON STICKS
1 cup dried APRICOTS


Heat the oven to 160C. Roll the beef in half the flour and brown in small batches using the vegetable oil. Add more oil as you need it, our pan is of the pretend non-stick variety so I need a bit more oil. Transfer each batch to a heavy oven proof dish and set aside. (Sorry for the distracting carrot photo, this is the first time I have ever grown a carrot that actually looks like a carrot, isn't it beautiful!)


Add the onion, carrot and garlic to the same pan and gently cook until soft, this will take about 5 minutes. Scrap the pan to get all the tasty bits left behind by the meat.


Stir in the coriander, cumin, ginger, turmeric, salt, bp and ground cinnamon, over a medium heat, stir until the spices have become deliciously aromatic, about 30 second to a minute should do it. Add the remaining flour and stir.


Add the tomatoes, liquid stock, honey and cinnamon sticks. Bring to the boil and simmer for 5 minutes. Transfer to the dish and stir to combine with the meat, cover with a lid or foil. Pop in the oven and leave for 2 1/2 hours, or so. I like to give it a stir every now and then. The ideal scenario is meat that will fall apart when pressed with the back of a spoon.


Once cooking time is done stir in the apricots and put back in the oven for about another 30 minutes, or until the fruit is swollen and soft.


I like my stew to be rich and thick, but if you prefer stew of a thinner consistency add some more water when you add in the apricots.


Serve the stew with some buttery couscous and green beans.


I love stew, and find it so economical, let me know your favourite stew, I am always keen to try different recipes.

We are off to another pot luck dinner this weekend, it may seem like this is the only social activity in out lives, and in truth without the occasional pot luck dinner we may never leave the house! Now I must go and decide what to cook, we are watching the All Blacks play so I think a sporting theme may be in order.

Wednesday, June 16, 2010

Feel Good Muesli Bar....the consequences of too much Pain!

So The Boss and I have just returned from his swimming lesson, it was rudely cut short by an 'incident' in the pool, nothing to do with us, thank god! I refrained from expressing my disgust, as I am guessing this can happen to any parent at any time. Its a bit like when I use to board planes and see children getting on, I am not a religious person, but I truly use to pray that the children would be sitting far far away from me. I am guessing I will be punished for my intolerance, at some point in the future, although I suspect we are a long way off jet setting by air.


Anyway, onto a more savoury topic...food. We managed to devour the bulk of the pastry's, I snuck two into the freezer, a pathetic attempt at self control. As a result of our unrestrained gluttony, I have made some muesli slice. This is not just regular muesli slice, there is so much goodness in this recipe, I don't know where to begin. A friend of mine kindly delivered a mountain of it when I first had The Boss, and she said it was a life saver for those moments when you have never felt so hungry in all your life. Breastfeeding seems to suck every calorie from your body, something I am very grateful for of course. But to avoid turning to a packet of Tim Tams, I found this muesli slice has been fabulous! Mr Hooper even agrees, and gobbles it up with glee (well maybe not glee, lets just say he will eat it).


So you need to get to the supermarket and head straight for the bulk bins as they will have pretty much everything you need, aside from the pantry staples:
125g butter
200g raw sugar
1 egg
125g wholemeal flour
1/2 tspn baking soda
125g rolled oats
30g pumpkin seeds
30g sunflower seeds
30g sesame seeds
30g slivered almonds
25g ground linseed
25 shredded coconut
50g dried apricots
50g raisins

Melt Butter. When cooled add sugar and egg, mix well.

In separate bowl mix all the other ingredients together.
Mix dry ingredients into butter mixture. I get my hands in there to make sure everything is mixed well. It might seem quite dry, but once it is all mixed, and pressed firmly into a 25cm square tin, it should be ready for baking. I use an expandable tin, to make things easier.

Bake at 180C for approx 10-15 minutes, depending on depth of mixture and how chewy you want it.


Turn it out of the tin before it is completely cooled and cut into pieces.


I mix things up with the dried fruit, I have made batches with crystallised ginger instead of raisins, and that was really good.


So with this slice of goodness you are getting all the great things LSA has to offer, such as digestive regularity, B vitamins, Omega 3 and fibre. As well as a great Zinc fix from the pumpkin and sesame seeds, which is essential in a good diet. Most importantly I have been loading up on Zinc as I started loosing hair by the handful when The Boss hit the 3 month mark. So if you are suffering from breastfeeding baldness, then this is the slice for you! I am encouraged by the knowledge the hair loss is not permanent, but right now my hair is a disaster site, thank goodness for elastic bands and headbands.


Make this slice for your friends who have had babies, its a good excuse to pay a visit, or make it for yourself, just because it is yummy and makes you feel so good.


Have a fab wednesday.

Monday, June 14, 2010

Pain au chocolat...with pleasure there comes pain

I am going against my own rules today, and pushing baking day to Wednesday. This is mainly because I spent the bulk of the weekend in the kitchen tyring to perfect the French pastry better known as pain au chocolat. We also need to have a break from baked goods. As it turns out my pastry worked perfectly, and as a result I have to avoid my jeans for the rest of the week, I think I can actually feel my hips growing wider....I keep looking at the baking tin and thinking I should pop them in the freezer, but my will is not strong enough, they are sooooo good.
I declared to Mr Hooper yesterday that I can officially cook anything, his response was that until I can 'perfect his spag bol recipe' (the only thing he can cook), I cannot award myself with such acclaim. There is something to be said about the old adage of opposite attracts, spag bol, is he kidding! Anyway, it is true I cannot officially cook anything, but I am certainly one step closer.


So I began on Friday night, at my third attempt of creating dough (some may say the easy stage!), I finally had something to work with. By Sunday afternoon I was putting the first bundles of joy in the oven. I am unsure how these can be considered a breakfast snack, as I would have had to be working in the middle of the night to present them at breakfast time.


I found my recipe in Leiths Baking Bible very unsatisfactory, so I turned to the net and found this great recipe and step by step guide for croissant. It is much the same pastry base as for pain au chocolat, and with a few tweaks I had created both croissant and pain au chocolat, what delight. As Mr Hooper and I shared the first offering, we were both struck by how much they tasted like the real thing, we were both stunned into silence, and had to try a few more, just to make sure. My only advice is to put them into the oven in small batches, it wasn't until about the third batch that I had my oven at the right temperature to prevent burning. Also I suggest you have the vacuum cleaner handy, I had made such a floury mess I had to vacuum the entire kitchen, including the benches. If you are planning a quiet weekend at home, and have always wanted to try making pain au chocolat, I would highly recommend giving it a crack. However if you have a favourite patisserie, I would suggest letting the professionals do all the hard work!

Here is some photographic evidence.....
I am so proud, I think I better go and have another one, just to make sure it wasn't all a dream.